Learn How to Create Lists in SwiftUI
Creating a scrolling list using UIKit comes with a bunch of boilerplate, cell dequeueing, etc. but SwiftUI has made that process so much easier!
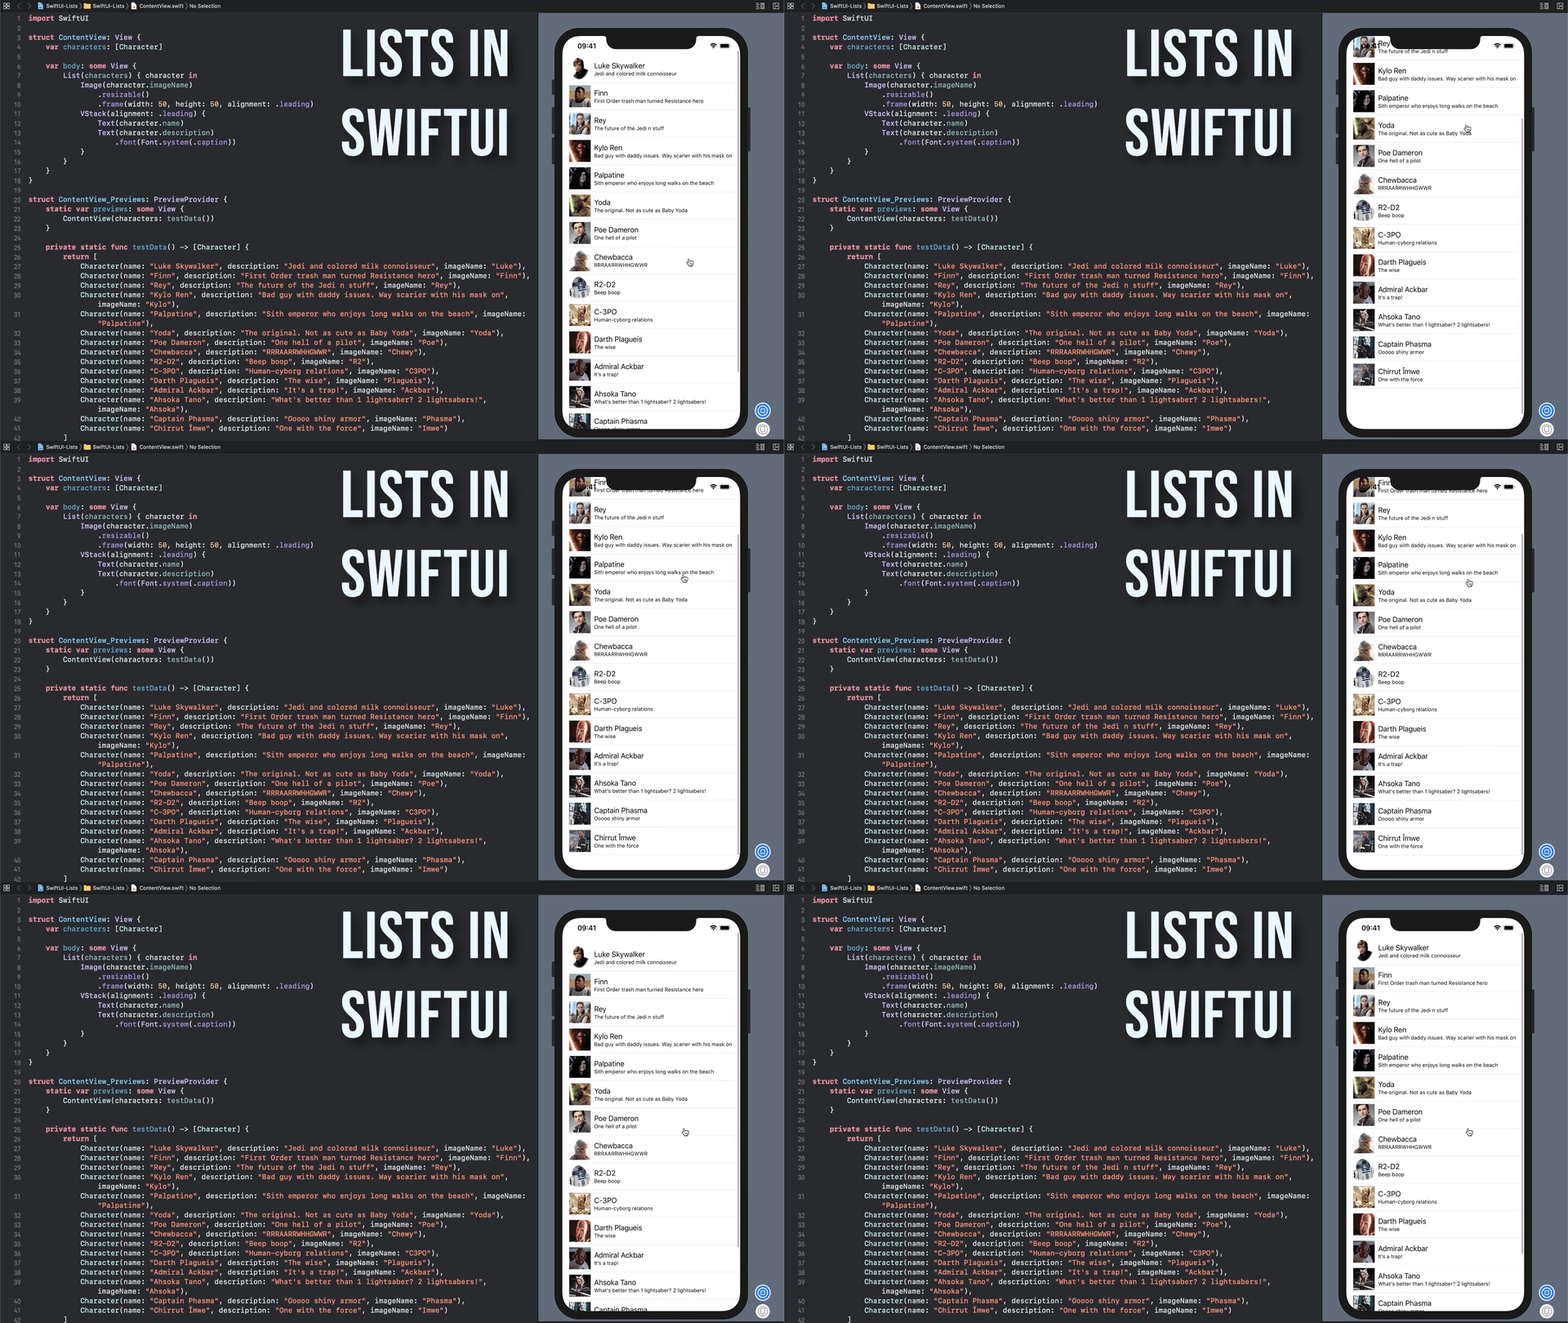
Let's break down what's going on in the code here:
var characters: [Character]First, on line 4 you have an array of Character objects. That array is the data source that is used to populate the list. Each Character object in this example has a unique id (required for lists), a name, description, and an image associated with it.
List(characters) { character inLine 7 is where the list itself is created. The characters array is passed in as the content for the list, which tells the list where it is going to get its data from. Following that there is a closure for setting up each cell within the list, using each item out of the source data (which in this case is the characters array).
Image(character.imageName)
    .resizable()
    .frame(width: 50, height: 50, alignment: .leading)
VStack(alignment: .leading) {
    Text(character.name)
    Text(character.description)
        .font(Font.system(.caption))
In this example I have a few things added to each cell on the next few lines - an image and a vertical stack view holding the name and description. If you wanted to keep it really simple you could just as easily add a single label with the character's name with Text(character.name) and you would get a list of cells displaying the character names.
The last bit at the bottom is just some test data for display in the preview window on the right.
You can check out the whole file below
import SwiftUI

struct ContentView: View {
    // Data Source
    var characters: [Character]

    var body: some View {
        // List Creation
        List(characters) { character in
            // Cell Layout
            Image(character.imageName)
                .resizable()
                .frame(width: 50, height: 50, alignment: .leading)
            VStack(alignment: .leading) {
                Text(character.name)
                Text(character.description)
                    .font(Font.system(.caption))
            }
        }
    }
}

// Test Data
struct ContentView_Previews: PreviewProvider {
    static var previews: some View {
        ContentView(characters: testData())
    }

    private static func testData() -> [Character] {
        return [
            Character(name: "Luke Skywalker", description: "Jedi and colored milk connoisseur", imageName: "Luke"),
            Character(name: "Finn", description: "First Order trash man turned Resistance hero", imageName: "Finn"),
            Character(name: "Rey", description: "The future of the Jedi n stuff", imageName: "Rey"),
            Character(name: "Kylo Ren", description: "Bad guy with daddy issues. Way scarier with his mask on", imageName: "Kylo"),
            Character(name: "Palpatine", description: "Sith emperor who enjoys long walks on the beach", imageName: "Palpatine"),
            Character(name: "Yoda", description: "The original. Not as cute as Baby Yoda", imageName: "Yoda"),
            Character(name: "Poe Dameron", description: "One hell of a pilot", imageName: "Poe"),
            Character(name: "Chewbacca", description: "RRRAARRWHHGWWR", imageName: "Chewy"),
            Character(name: "R2-D2", description: "Beep boop", imageName: "R2"),
            Character(name: "C-3PO", description: "Human-cyborg relations", imageName: "C3PO"),
            Character(name: "Darth Plagueis", description: "The wise", imageName: "Plagueis"),
            Character(name: "Admiral Ackbar", description: "It's a trap!", imageName: "Ackbar"),
            Character(name: "Ahsoka Tano", description: "What's better than 1 lightsaber? 2 lightsabers!", imageName: "Ahsoka"),
            Character(name: "Captain Phasma", description: "Ooooo shiny armor", imageName: "Phasma"),
            Character(name: "Chirrut Îmwe", description: "One with the force", imageName: "Imwe")
        ]
    }
}
And here is what the Character struct looks like
import Foundation

struct Character: Identifiable {
    let id = UUID()
    let name: String
    let description: String
    let imageName: String
}