Setting SwiftUI Modifiers With the Attributes Inspector
The Attributes Inspector is one of the things that makes SwiftUI such a huge leap forward in building interfaces for apps. Without having to write any code you can use the Attributes Inspector to move Views around, set properties such as font and color, add accessibility identifiers, etc. 🤯
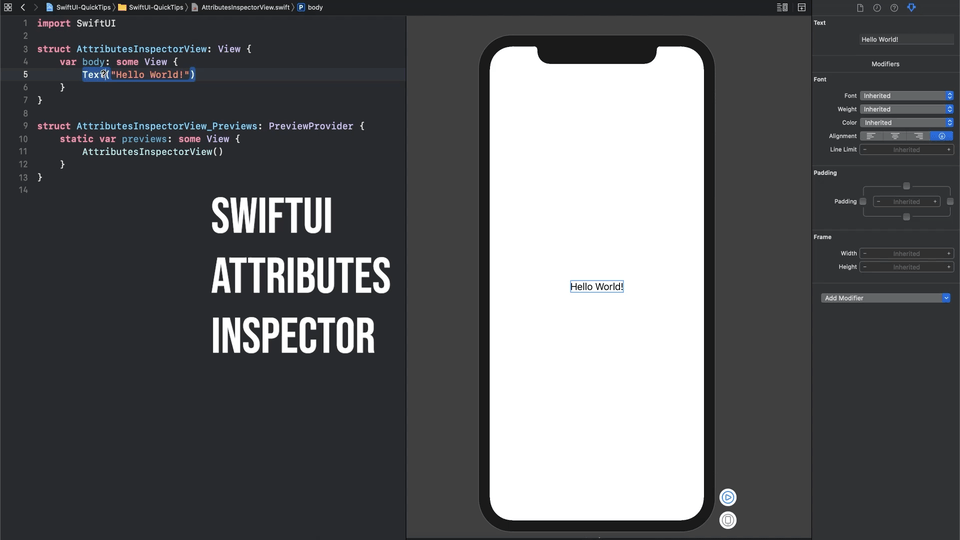
Where is the Attributes Inspector?

If you place your cursor on any type of View in your code you’ll be able to find the Attributes Inspector on the far right tab of the right side pane of Xcode. As you select different Views the Attributes Inspector will update to display different modifiers that are available by default. The screenshot above shows the modifiers for Text.
In addition to the right side of Xcode there is a keyboard shortcut to bring it up. To bring the Attributes Inspector up inline in your code first you’ll need to hold
Ctrl + Option
Then click on the View you would like to start modifying and the window will pop up.

Once you have the Attributes Inspector open you can start playing with the different modifiers and watch the preview on the right live update with your changes! No more having to make a change, build, navigate to the view you’re testing to see if it looks good, then repeat. Everything can be done right from that window.